 (+035) 527-1710-70
 NEWSLETTER

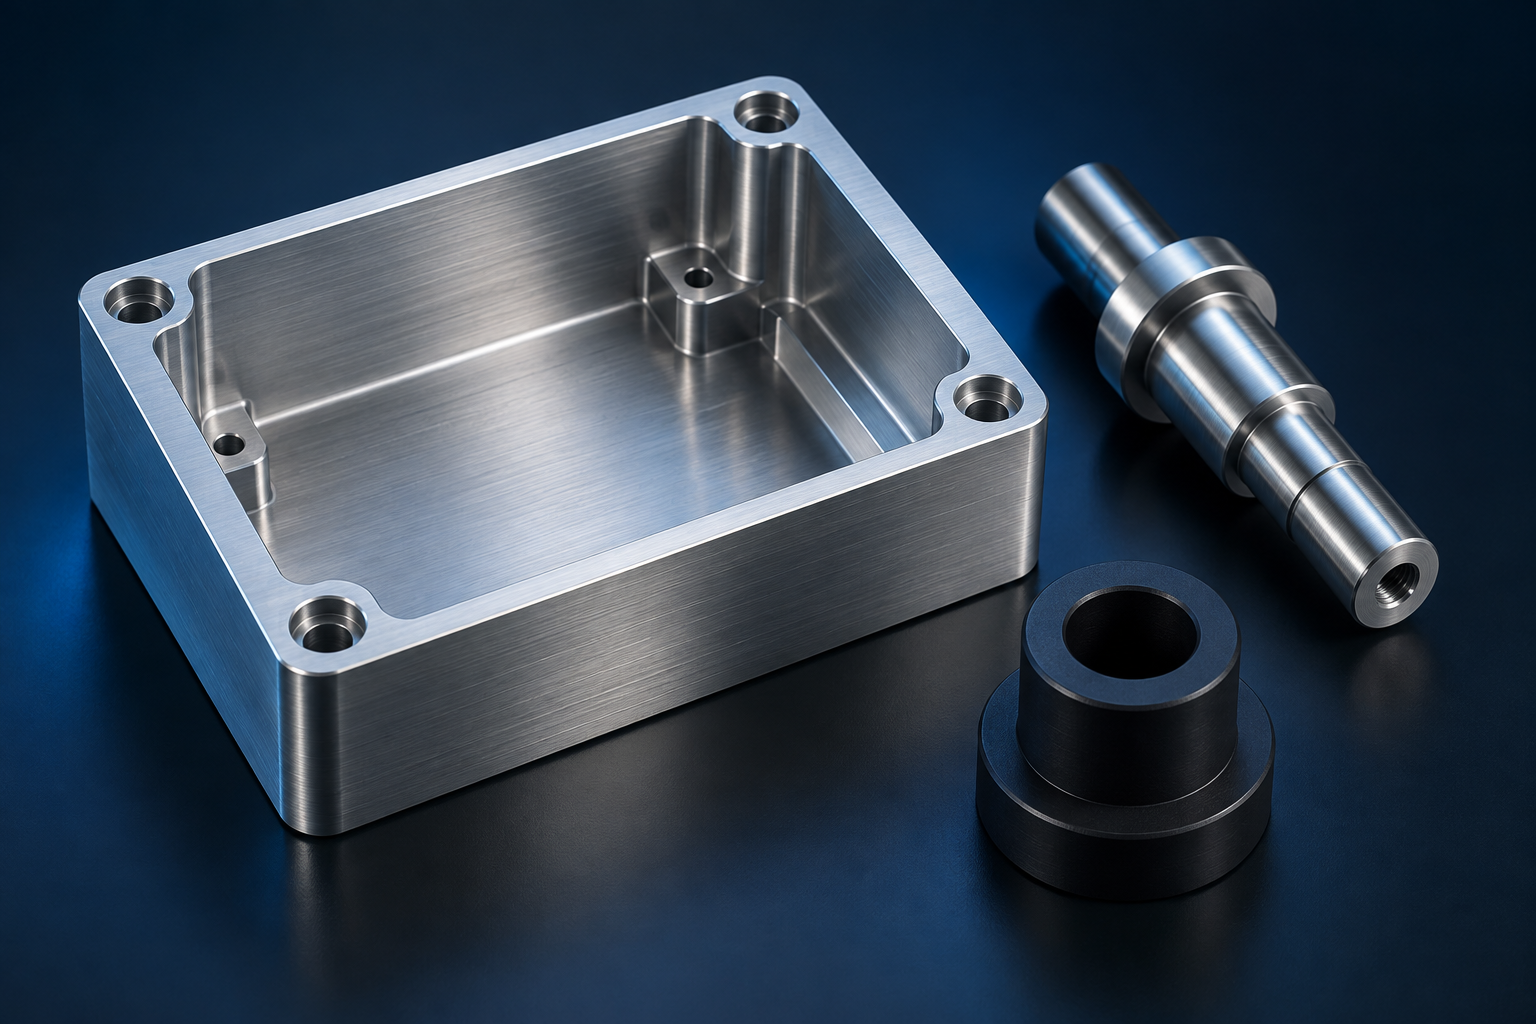
CNC prototype machining produces test parts by cutting material from solid stock. You can evaluate fit, function and assembly using production-relevant metals or plastics. The best results start with a clear test objective, realistic tolerances and an inspection plan.
When CNC Prototype Machining Makes Sense
Choose CNC machining when material behavior and accurately machined interfaces matter to your test.
A printed housing can reveal an ergonomic problem. A machined housing can also test bearing fits, threaded connections and sealing faces. You may need both during development.
Machining suits one-off designs and small batches because you avoid a dedicated production mold. However, you still pay for programming, workholding and inspection preparation. A simple part may need several setups if its important features face different directions.
| Prototype Requirement | Suitable Starting Route | Main Limitation |
| Fit and functional testing in specified metal | CNC milling or turning | Tool access limits internal geometry |
| Complex internal passages | Additive manufacturing | Surface quality and properties need evaluation |
| Thin formed enclosure | Sheet metal fabrication | Bend geometry affects dimensions |
| Validation of molded behavior | Injection molding trials | Tooling and process development are required |
Select Material For The Test You Need
Use the intended production material when the test depends on its mechanical, thermal or chemical behavior.
An inexpensive substitute may suit an assembly mockup. It can mislead you during wear, stiffness or temperature testing. Specify the alloy and temper for metals. For plastics, specify the grade, reinforcement and required conditioning.
For example, an aluminum bracket may pass a static fit check in several alloys. Fatigue performance requires a more specific evaluation. A machined plastic sample also cannot reproduce every effect of molding, including weld lines and fiber orientation.
Turn Your CAD Model Into A Machining Package
Provide a solid model alongside a drawing that identifies acceptance requirements.
The model communicates shape. Your drawing should identify datums, critical fits, threads, surface requirements and the controlling revision. Avoid placing the tightest tolerance on every dimension. Instead, connect each requirement to a functional need.
The ASME Y14 standards provide frameworks for communicating drawing and tolerancing requirements. Select the applicable convention and state its edition.
Before requesting a quote, check these features:
- Internal corners must accommodate a rotating cutter or another specified process.
- Deep pockets need tool clearance and adequate reach.
- Thin walls need support during cutting and inspection.
- Blind threads need space beyond the required full thread.
- Finished fits must account for coatings and subsequent processing.
Validate The Prototype Against Its Purpose
Inspect the features that determine whether your prototype can answer the original design question.
If you are testing a seal, verify the groove and mating surface before interpreting a leak. If you are testing alignment, measure the relevant datum relationships. A failed assembly test cannot identify its cause when the prototype itself remains unverified.
Record drawing revision, material identification, inspection results and test conditions together. Keep deviations visible. An approved prototype deviation should not silently become the production requirement.
Build A Prototype Plan Around Specific Questions
A useful prototype plan assigns a decision to every test part you order.
Start by separating geometry questions from material and process questions. An assembly mockup can reveal a collision between a cover and connector. It cannot establish whether a different production material will survive repeated loading. Likewise, a leak test tells you little when the seal groove was intentionally left unfinished.
Write a short validation matrix before requesting the quotation. This also helps the supplier distinguish essential requirements from features that can remain provisional.
| Design Question | Prototype Must Reproduce | Evidence To Record |
| Does the bearing assemble correctly? | Seat size, entry geometry and datum relationship | Measured seat and assembly observations |
| Does the cover seal? | Groove geometry, mating finish and actual seal | Test conditions and measured leakage |
| Does the bracket align two modules? | Locating features and assembled interfaces | Alignment results across the assembled stack |
| Does the housing dissipate heat adequately? | Relevant material, contact surfaces and thermal interfaces | Controlled thermal test results |
| Can the part be assembled repeatedly? | Threads, inserts and tool access | Assembly cycles and observed damage |
Order enough parts to distinguish a design issue from an isolated manufacturing problem. There is no universal sample quantity. A destructive test needs a different plan from a reversible assembly check. Include spare pieces when another test would otherwise consume the entire batch.
Follow The Manufacturing Sequence From Stock To Test
The prototype route should preserve the dimensions and surface conditions that your validation requires.
First, the supplier reviews the model, drawing and stock choice. Programming then establishes tool access and machining order. Workholding must support roughing without damaging the surfaces reserved for final inspection.
Roughing removes most of the material. Finishing establishes controlled surfaces after the main material removal. Deburring and cleaning follow, with extra attention to intersecting passages and threaded holes. A coating or heat-treatment operation may require another inspection stage.
Consider a pocketed aluminum enclosure as an illustrative example. Machining the cavity first can change how the remaining wall behaves during later clamping. A supplier may leave temporary support or reserve a finishing allowance. The appropriate sequence depends on the actual geometry and stock condition.
Ask which surfaces will be used for locating each setup. This question often reveals a hidden issue sooner than asking for the machine’s advertised precision. If a second setup references an unfinished surface, the resulting alignment may not match your intended datum system.
Compare Design Changes By Their Functional Cost
The most useful design change removes manufacturing difficulty while preserving the test’s purpose.
Suppose a cavity has a tight internal corner that does not contact another component. A larger radius may allow a shorter, stronger cutter. That change can reduce cutting time and tool deflection. If a square insert must fit the corner, however, you need a different solution.
Options might include corner reliefs, a revised mating part or an additional manufacturing process. The supplier should describe the effect before you approve it. A manufacturability suggestion is not permission to change your design automatically.
Evaluate cosmetic requirements the same way. A uniform blasted finish may be essential for an appearance review. It may add little value to a hidden bracket undergoing initial fit testing. Preserve the final finish when it changes friction, electrical contact or assembly clearance.
Transfer Prototype Learning Into Production
Prototype approval should produce a controlled specification rather than an informal statement that the part looks acceptable.
Record which requirements passed, which deviations were accepted and which questions remain open. Update the model and drawing together. Keep an approved prototype for comparison when practical, but do not make it the only source of acceptance criteria.
If production will use another process, create a separate validation plan for the differences. A cast blank can introduce porosity considerations. A molded plastic part can introduce weld lines and directional reinforcement. A forged blank can require different machining allowances.
The commercial handover also matters. Confirm recurring quantities, inspection records, packaging and change control. A prototype quote may include manual attention that is unsuitable for repeat production. Review the repeat route before treating the prototype price or lead time as a production commitment.
Separate Prototype Fidelity Into Four Decisions
You should define geometric, material, surface and manufacturing fidelity independently before ordering a prototype.
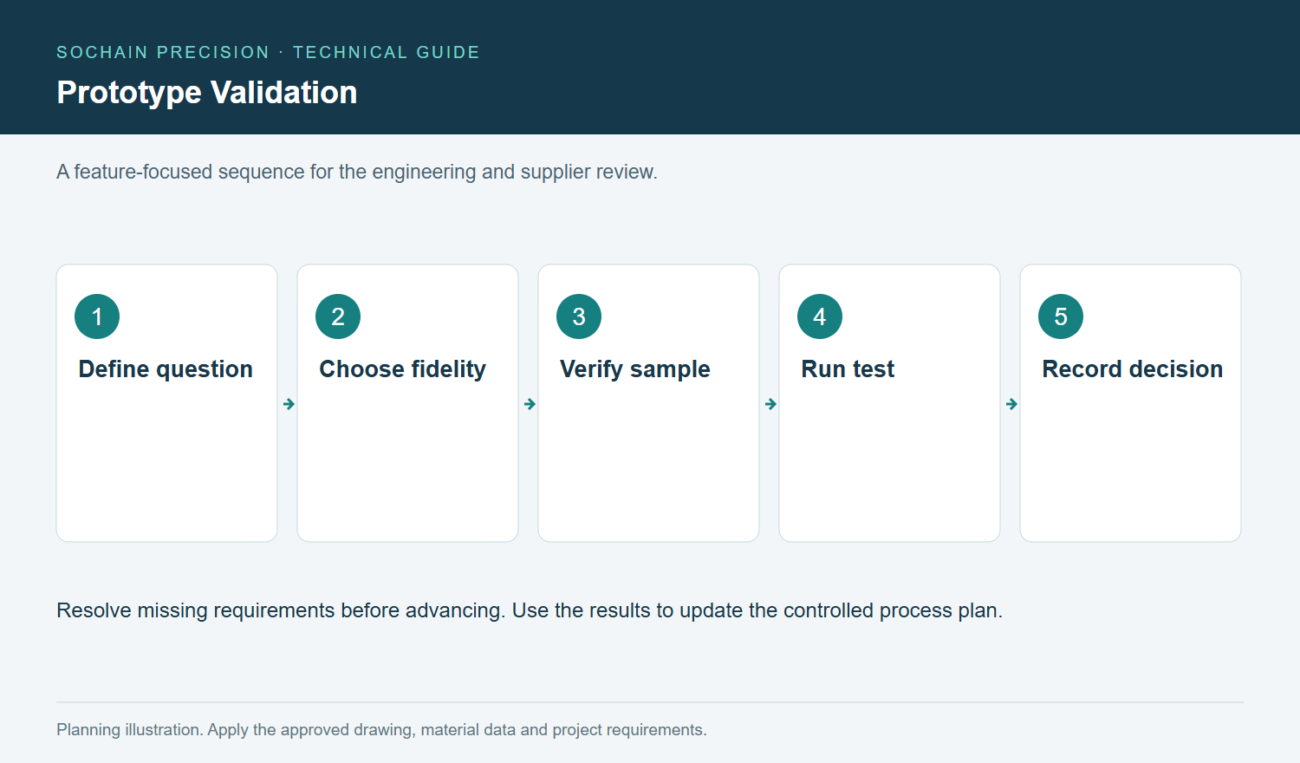
Prototype Validation. Follow the sequence while resolving project-specific requirements.
Geometric fidelity concerns the shape and relationships needed for the test. A bracket needs its mounting pattern reproduced accurately. Its cosmetic edge treatment may remain provisional. Record that distinction so the supplier can prioritize meaningful features.
Material fidelity concerns the behavior under investigation. A stronger alloy does not automatically make a more representative prototype. Different stiffness, corrosion behavior or thermal expansion can change the result. Match the material condition whenever those properties influence the decision.
Surface fidelity concerns contact, sealing, friction and appearance. An unfinished shaft may fit differently after coating. A polished demonstration sample may conceal tool marks that affect production cleaning. Identify the surfaces whose condition must represent the final part.
Manufacturing fidelity concerns effects introduced by the intended production route. Machining a molded component from stock can validate packaging space. It cannot establish gate performance or weld-line behavior. Treat those as separate validation tasks with their own samples.
This approach prevents one successful prototype from becoming evidence for claims it never tested. You can also reduce cost deliberately. Simplify only the features that sit outside the test boundary.
Investigate A Failed Prototype Before Changing The Design
You should confirm the sample condition before interpreting a failed functional test as a design failure.
Consider an illustrative cover that leaks during a pressure test. First confirm the drawing revision and seal installation. Then inspect the groove dimensions, mating-face condition and fastener assembly. A machining deviation and an unsuitable seal design require different corrective actions.
Keep the test article identifiable while investigating. Record which measurements were taken before testing and which followed disassembly. Damage introduced during the test can obscure the original manufacturing condition.
Use a short sequence:
- Check the tested configuration against the approved build record.
- Verify the features most directly connected to the failure.
- Identify uncontrolled test conditions or assembly differences.
- Decide whether to repeat, repair or redesign.
- Record what the next sample must prove.
Avoid changing several unrelated features at once when you need to identify a cause. A revised prototype that succeeds may still leave the original failure unexplained. When schedule requires combined changes, document that limitation explicitly.
Your supplier can review manufacturability and measurement evidence. The engineering team should retain responsibility for interpreting product performance against its intended use.
Compare Prototype Quotes On The Same Scope
You can compare quotations fairly only when their material, finishing, inspection and delivery assumptions match.
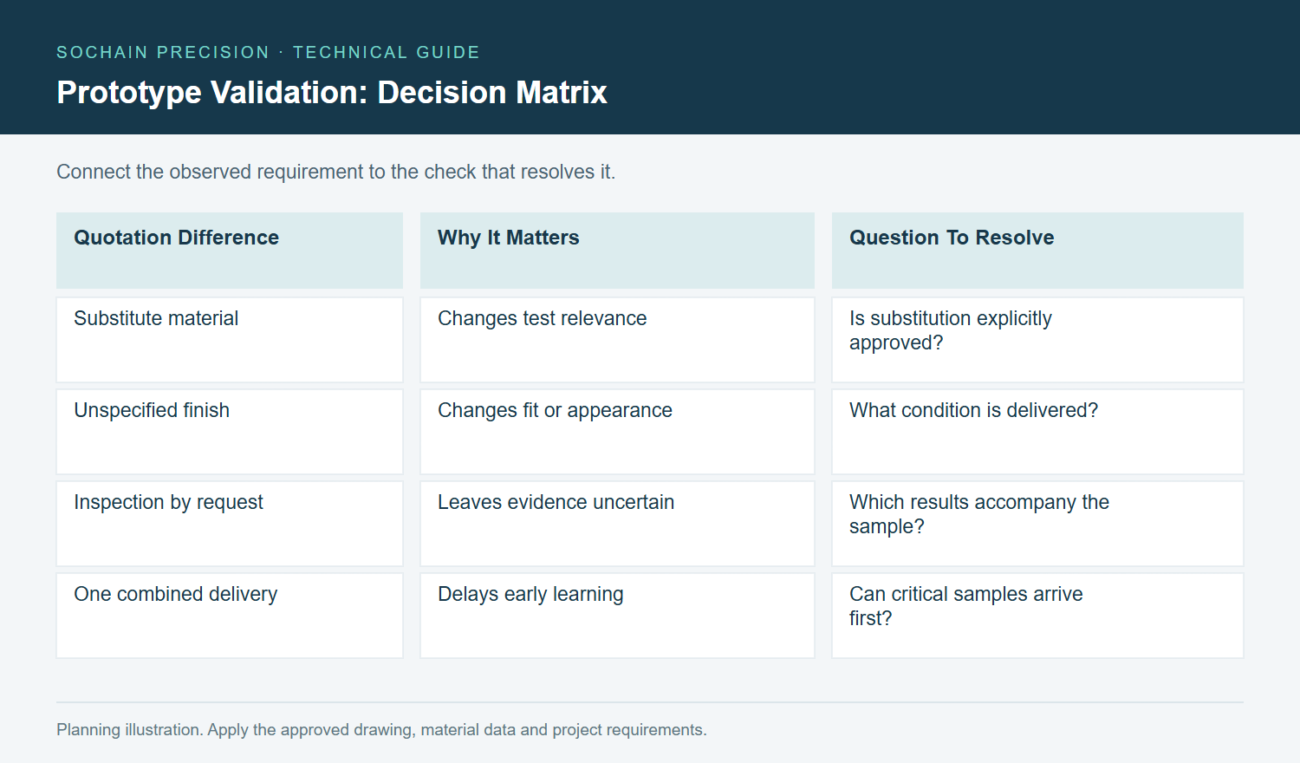
Prototype Validation: compare the requirements and checks discussed in this article.
One quotation may cover machined geometry alone. Another may include material documents, finishing and a dimensional report. Comparing their totals without reconciling those differences rewards incomplete scope.
Ask each supplier to identify included operations and outstanding assumptions. Separate recurring part costs from initial programming or dedicated fixtures where practical. This helps you understand the consequence of a repeat order or design revision.
| Quotation Difference | Why It Matters | Question To Resolve |
| Substitute material | Changes test relevance | Is substitution explicitly approved? |
| Unspecified finish | Changes fit or appearance | What condition is delivered? |
| Inspection by request | Leaves evidence uncertain | Which results accompany the sample? |
| One combined delivery | Delays early learning | Can critical samples arrive first? |
Treat a fast delivery promise as incomplete until the required material and finishing steps are considered. An early unfinished sample can be useful. Label its test limitations instead of treating it as the final configuration.
For a repeat build, send the accepted revision and deviation history together. Do not assume an earlier email exchange remains part of the supplier’s production instructions.
Transfer Learning Into The Next Build
You should close each prototype cycle with an updated requirement and a clear decision about the next build.
Record accepted dimensions, unresolved interfaces and any temporary workmanship allowances. Separate observations from conclusions. “Cover contacted connector” is an observation. “Move connector mounting holes” is a proposed design action requiring review.
Retain photographs and measurements against the sample identifier. A visually similar later sample may contain a different material or revision. Traceability prevents those results from being combined accidentally.
Before moving toward production, review which requirements remain untested. Include finishing consistency, inspection access and assembly variation. A single successful sample demonstrates that configuration under those conditions. It does not establish long-term process capability.
The most useful prototype package therefore ends with fewer unknowns. It also explains which unknowns remain and how the next manufacturing step will address them.
Control Cost Without Weakening The Test
Reduce unnecessary setups and inspection demands before compromising functional requirements.
Ask for a separate assessment of geometry, finishing and documentation costs. You may discover that an inaccessible feature drives more expense than the material. Request pricing at your prototype quantity and expected next-stage quantity. This reveals whether the manufacturing route remains practical.
Sochain provides custom machining and prototyping. Send the intended test conditions so the quotation can address the features that matter.
For related background, see our CNC machining tolerances guide.
Frequently Asked Questions
You should resolve production relevance and acceptance criteria before ordering your prototype.
Does A CNC Prototype Guarantee Production Performance?
No. Production tooling, forming, heat treatment or molding can introduce effects absent from a machined prototype. Validate those separately.
Should You Finish A Prototype Before Testing?
Yes, when the finish affects fit, friction, corrosion behavior or appearance acceptance. Otherwise, an unfinished sample may answer your question.
What Should You Send For A Quote?
Send CAD, the drawing revision, material, quantity, critical features and required test date. Request a quote with that package.